Dark circles rarely disappear through makeup alone. Their appearance may come from pigmentation, visible blood vessels, shadows, dehydration, or naturally deep tear troughs. Understanding the cause makes concealer application more realistic and reliable. As professional makeup artist Bobbi Brown says, “The right concealer can make you look like you had eight hours of sleep.” That promise is encouraging, but it is not magic.
Learning how to cover dark circles with concealer begins with thin, targeted layers. Start with clean, moisturized skin, then wait briefly for the cream to settle. Apply a peach or salmon corrector when the circles look blue or purple. Use a muted orange shade for deeper complexions when darkness appears more brown or gray. Tap the product into the inner corner and along the hollow, rather than covering the entire under-eye area. A small, flexible brush gives control. Your ring finger can soften the edges.
Less product often looks better. Too much concealer gathers in fine lines beside the nose and beneath the lashes. Choose a concealer close to your skin tone, or one shade lighter for subtle brightness. Set only the creased areas with a tiny amount of finely milled powder. Avoid heavy baking if your skin feels dry. It may look flawless for ten minutes, then emphasize texture.
Even skilled artists adjust their technique. Lighting changes everything. Check your makeup near a window, and photograph it from a normal distance. Results may remain imperfect, especially with genetic hollows or persistent pigmentation. That is acceptable. The goal is fresher-looking skin, not an erased face.
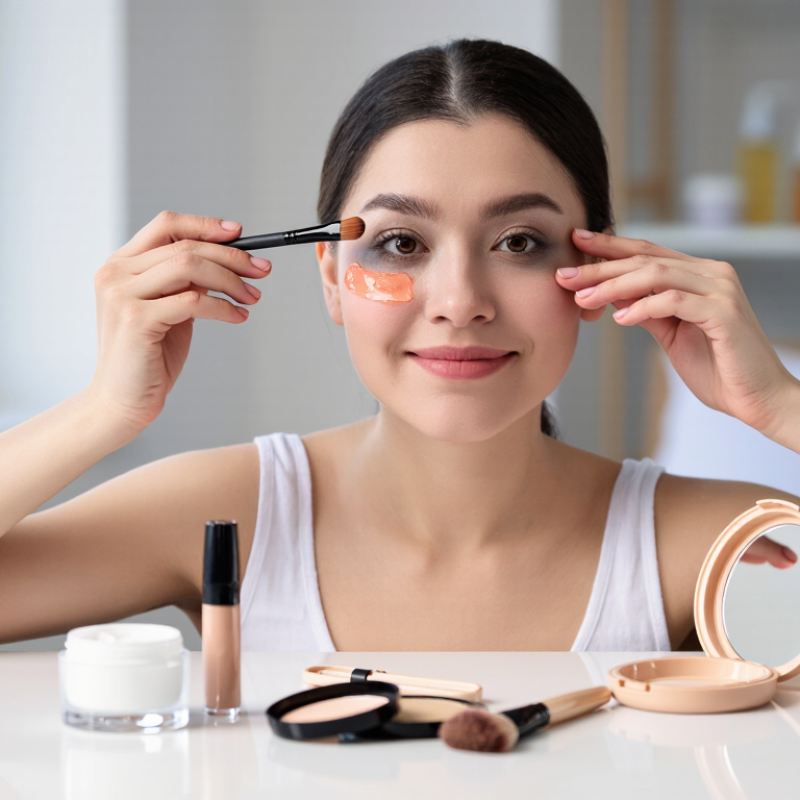
How to Cover Dark Circles with Concealer Like a Pro?
Dark circles do not all come from the same source. Thin skin can reveal blue or purple vessels, while melanin creates brown or gray discoloration. Hollow tear troughs create a shadow, even when the skin itself is clear. The American Academy of Dermatology identifies genetics, aging, sun exposure, rubbing, and dermatitis as common contributors. CDC reporting also shows that roughly one in three adults regularly gets insufficient sleep, which can make under-eye darkness look more noticeable.
Concealer changes appearance, not structure. A thick, pale formula may brighten pigment but emphasize hollowness and fine lines. Blue-purple circles usually need a small amount of peach or salmon correction. Brown circles may respond better to a muted orange or apricot tone. Test the shade beside a window, not under a yellow bathroom lamp. Lighting can mislead you.
Use a tiny brush to place product only on the darkest areas, then tap the edges with a fingertip. Leave the inner corner lighter. Professional dermatology reviews describe pigmentation, vascular visibility, and shadowing as separate mechanisms, so one concealer cannot solve every case. I still see people over-correcting the lower lid, creating a pale crescent that looks more artificial than the original darkness. Set sparingly; powder can settle into texture within minutes.
Dark circles can look different under concealer because skin discoloration varies in hue. Color theory pairs each visible hue with an opposite hue on the color wheel: peach or orange can balance blue-purple tones, while green can balance red tones. These hue angles are visual reference points rather than clinical measurements.
Dark circles rarely share one color. Some look blue or purple, while others appear brown, gray, or slightly red. I used to choose a concealer one shade lighter, but that often made the area look chalky. Color correction works better. Peach can soften blue tones on fair to light skin. Salmon suits many medium complexions. Orange or terracotta may balance deeper blue or purple shadows on rich skin tones. Brown discoloration may respond better to a muted peach or warm yellow, depending on the undertone.
Less is usually better. A 2023 McKinsey beauty market report projects global beauty sales could reach about $580 billion by 2027, showing how quickly complexion products are evolving. Yet more choices do not guarantee a better match. Test shades along the jaw and under the eye, using daylight. The correct concealer should disappear into surrounding skin, not look visibly brighter. Wait a minute before judging. Some formulas deepen slightly as they set.
Apply a pin-sized amount near the inner corner, then tap outward with a small brush or fingertip. Keep the neutral concealer close to your skin tone. Use correction only where darkness remains. My own imperfect habit is over-layering the outer corner, which emphasizes fine lines. A thin, flexible layer usually looks more natural. Persistent darkness can also reflect genetics, allergies, pigmentation, or sleep patterns, so makeup cannot solve every cause.
| Dark-Circle Appearance | Recommended Corrector Tone | Best Concealer Shade for Natural Coverage | Suggested Formula | Application Method |
|---|---|---|---|---|
| Blue or blue-purple shadows on fair to light skin | Soft peach or salmon | A concealer matching the surrounding skin, or up to one shade lighter | Lightweight, hydrating, medium coverage | Apply a thin layer only to the discolored area, then tap gently with a fingertip or damp sponge |
| Blue, violet, or gray shadows on medium skin | Peach, apricot, or warm salmon | A skin-matching concealer with a neutral or warm undertone | Creamy medium coverage with a natural finish | Place product along the inner corner and hollow, keeping the outer edge sheer |
| Deep blue or purple shadows on tan to deep skin | Orange, terracotta, or red-orange, used sparingly | A concealer that matches the face or is slightly brighter than the corrected area | Flexible, buildable cream formula | Use a pinpoint amount and blend the edges thoroughly to prevent an orange cast |
| Brown or gray-brown pigmentation | Peach, apricot, or a muted orange depending on skin depth | A neutral-to-warm shade that matches the cheek and nose area | Medium coverage with a satin or natural finish | Correct first, allow it to set briefly, then press concealer over the area |
| Redness near the inner eye or along visible vessels | Very small amount of muted yellow or yellow-green corrector | A skin-matching neutral concealer | Thin, flexible formula to reduce creasing | Use a small flat brush for precision, then soften the perimeter with a clean sponge |
| Mild darkness with little discoloration | Usually no corrector is needed | A concealer matching the skin tone for the most natural result | Sheer to light coverage with a hydrating finish | Apply three small dots under each eye and blend outward |
Great concealer begins before the product touches your skin. Wash gently with lukewarm water, then pat the under-eye area dry. Rubbing can increase redness and irritation, especially on thin skin. Apply a lightweight, fragrance-free moisturizer with your ring finger. Use tapping motions, not dragging movements. Give it two minutes to settle. This small pause helps prevent concealer from slipping into fine lines.
The American Academy of Dermatology recommends daily broad-spectrum sunscreen with SPF 30 or higher. Apply it carefully around the orbital bone, avoiding direct contact with your eyes. Sun exposure can deepen uneven pigmentation over time.
The Centers for Disease Control and Prevention recommends at least seven hours of sleep for adults aged 18 to 60. Sleep cannot erase inherited shadows, though it may reduce a tired appearance. A peer-reviewed review in the Journal of Cosmetic Dermatology also connects skin dehydration with more visible fine lines. Hydration matters.
I still sometimes apply too much eye cream. That mistake makes concealer move. If the area feels slick, press it gently with tissue before makeup. Then use a thin layer of color-correcting concealer only where darkness shows. Add regular concealer in small dots. Let each layer dry briefly. Heavy coverage often looks less polished by midday.
Start with a clean, moisturized under-eye area. Use a small amount of lightweight eye cream, then wait two minutes. This pause matters. The American Academy of Dermatology recommends moisturizing because hydrated skin can look smoother and less creased. Tap away excess product with a tissue. Too much moisture may cause concealer to slide.
Choose a concealer close to your skin tone, not several shades lighter. Apply three tiny dots only where darkness appears: the inner corner, hollow, and outer shadow. Warm the product with your ring finger, then press it into the skin. Do not drag. A damp sponge can soften edges, but it may remove coverage if used too heavily. Circana’s 2024 U.S. prestige beauty report showed makeup sales rising 8%, reflecting continued demand for complexion products. Still, more product is not better. Usually, it makes lines more visible.
Set only the deepest crease with a barely visible layer of finely milled powder. Leave the rest flexible. Smile gently and check the area in daylight. If the concealer gathers, remove that spot with a cotton swab, then use less. I once added extra coverage before checking the texture. It looked polished indoors and cakey outside. That mistake still guides my routine. Let real skin remain visible. It often looks more professional.
A professional finish begins with controlled setting, not heavy powder. After blending concealer beneath the eyes, I wait about 30 seconds before checking the creases. This short pause reveals where the product is settling. I gently smooth those lines with a clean fingertip, then press away excess moisture with a tissue. Rubbing usually removes coverage.
I use a small, soft brush to press a tiny amount of finely milled setting powder under the eyes. Pressing works better than sweeping because it keeps the concealer in place. I focus on the inner corner, lower lash line, and deepest shadow. The outer area needs less product. Too much powder can make delicate skin look dry and textured. I learned this through repeated mistakes during long photo sessions.
For touch-ups, I first remove oil with a clean cotton swab or tissue. Adding fresh concealer over shine can create a thick, uneven patch. I apply half a pea-sized amount only where darkness has returned, then tap the edges until they disappear. A slightly damp sponge can soften excess product, but it may lift coverage if pressed too firmly. Check the result in natural window light. Bathroom lighting has fooled me more than once. For extended wear, carry a small mirror and clean tools, especially when working around sensitive eyes.
Wash gently with lukewarm water and pat dry. Do not rub the delicate skin. Apply lightweight, fragrance-free moisturizer with your ring finger. Wait two minutes.
Use a thin layer. If the skin feels slick, press it gently with tissue. Too much product can make concealer slide. Less is better.
Apply broad-spectrum SPF 30 or higher near the orbital bone. Avoid direct contact with your eyes. Daily protection may help prevent darker uneven pigmentation.
Use three tiny dots where darkness appears. Place them near the inner corner, hollow, and outer shadow. Avoid covering the entire under-eye area.
Choose a shade close to your skin tone. Several shades lighter may highlight texture. A closer match usually looks more natural.
Warm the product with your ring finger. Press gently instead of dragging. A damp sponge can soften edges, but pressing too hard may remove coverage.
Apply thin layers and let each layer dry briefly. Wait about thirty seconds before checking creases. Smooth gathered product with a clean fingertip, then use less.
Use a tiny amount of finely milled powder only in the deepest crease. Press it with a small, soft brush. Heavy powder can make skin look dry.
Remove oil with a clean cotton swab or tissue first. Add half a pea-sized amount only where darkness returns. Tap the edges carefully.
Indoor lighting can hide uneven texture. Check your makeup near a window. I once added extra coverage too soon. It looked polished, but not in daylight.
Learning how to cover dark circles with concealer begins with understanding that under-eye discoloration can vary from blue and purple to brown or gray, and may appear more noticeable depending on lighting, skin tone, and dryness. The right approach is to choose a correcting shade that gently neutralizes the darkness, followed by a concealer that closely matches your complexion for natural-looking coverage. Avoid applying too much product, as heavy layers can make the area look cakey.
For a smooth, long-lasting result, prepare the under-eye area with gentle hydration and allow it to absorb before applying makeup. Use a small amount of concealer, placing it where darkness is strongest and blending outward with light tapping motions. Keep the product away from fine lines whenever possible, and set it lightly with a small amount of finely milled powder. Throughout the day, refresh the area by carefully pressing away excess oil before adding a minimal touch of concealer.
